The key steps for a successful setup on The Ambassador Platform are summarized here.
Here is a brief overview of the steps involved in setting up your account on The Ambassador Platform.
If you haven't already received a link to create an account, please contact us through support and we'll share it with you directly. (We don't make this link publicly available). By clicking on this link, you'll be taken to the Setup Guide for creating your account.
1. Linking your privacy policy to the platform
We will ask you to input a link to your Privacy Policy into the platform so that we can display this to your users on sign up.
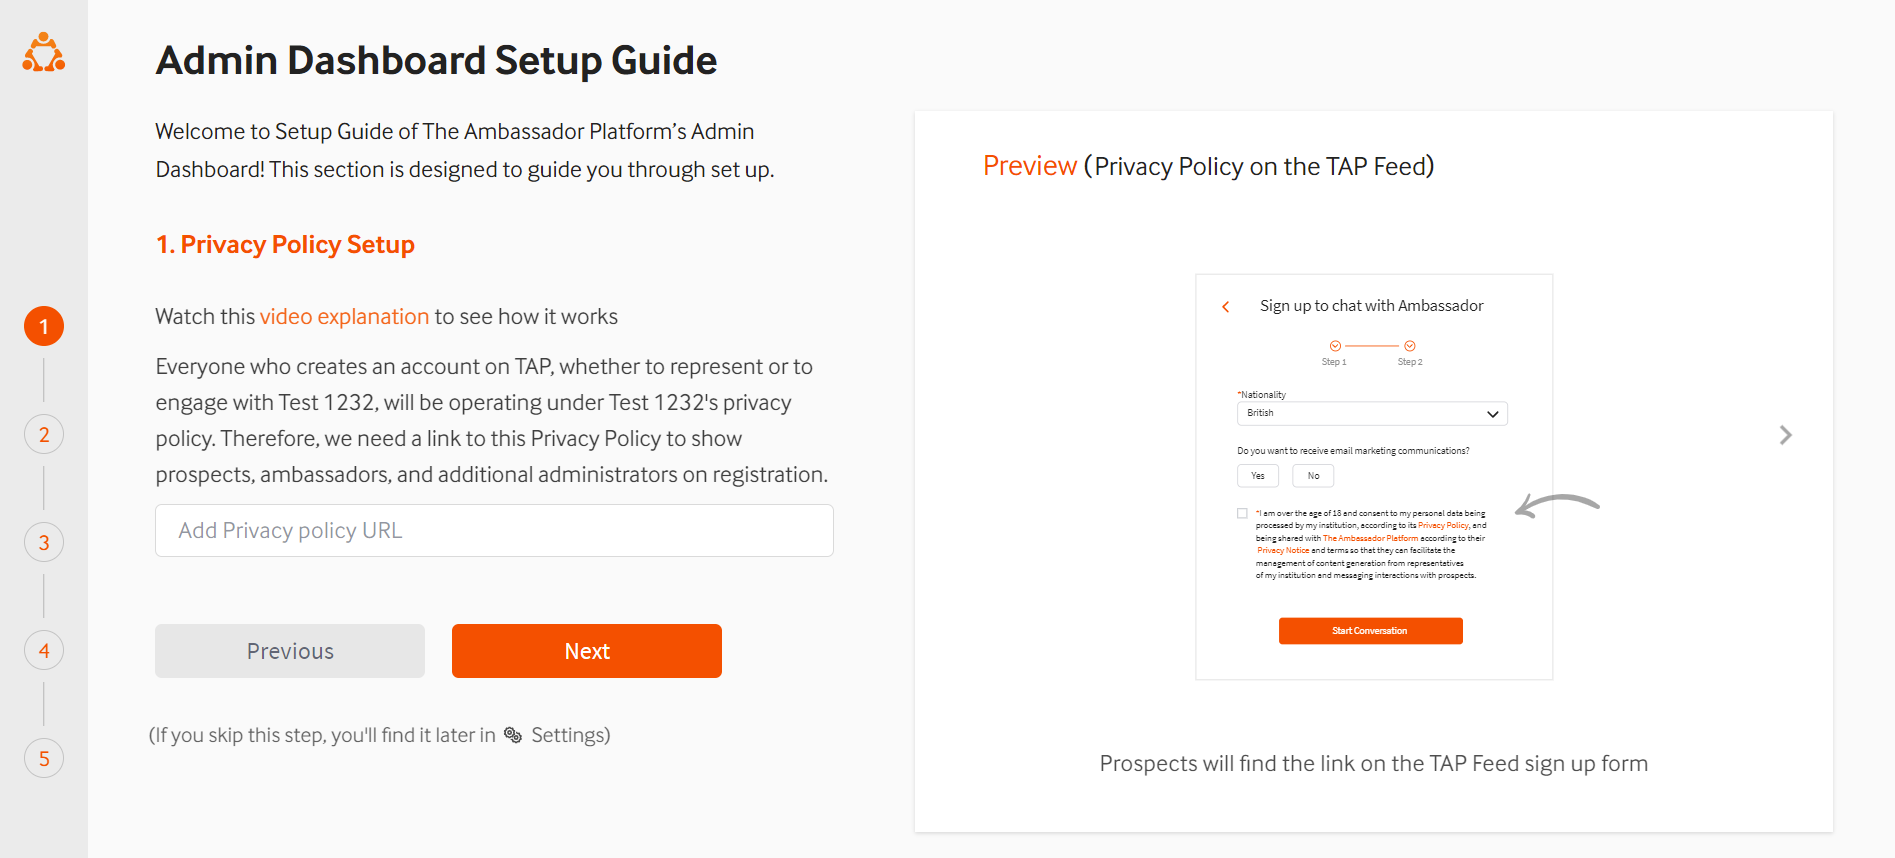
The Ambassador Platform is a Data Processor (as understood in the context of the GDPR). You are the Data Controller and are responsible for the data we process on your behalf. We will display the privacy policy you have linked to all users of The Ambassador Platform (students, staff and prospective students) when they create an account. You can read more about this in our legal set up article.
2. Inviting your ambassadors to the Training Center
Inviting your ambassadors to our Training Center couldn't be easier, you just copy the URL link and send it in an email. We even have an email template you might like to use.
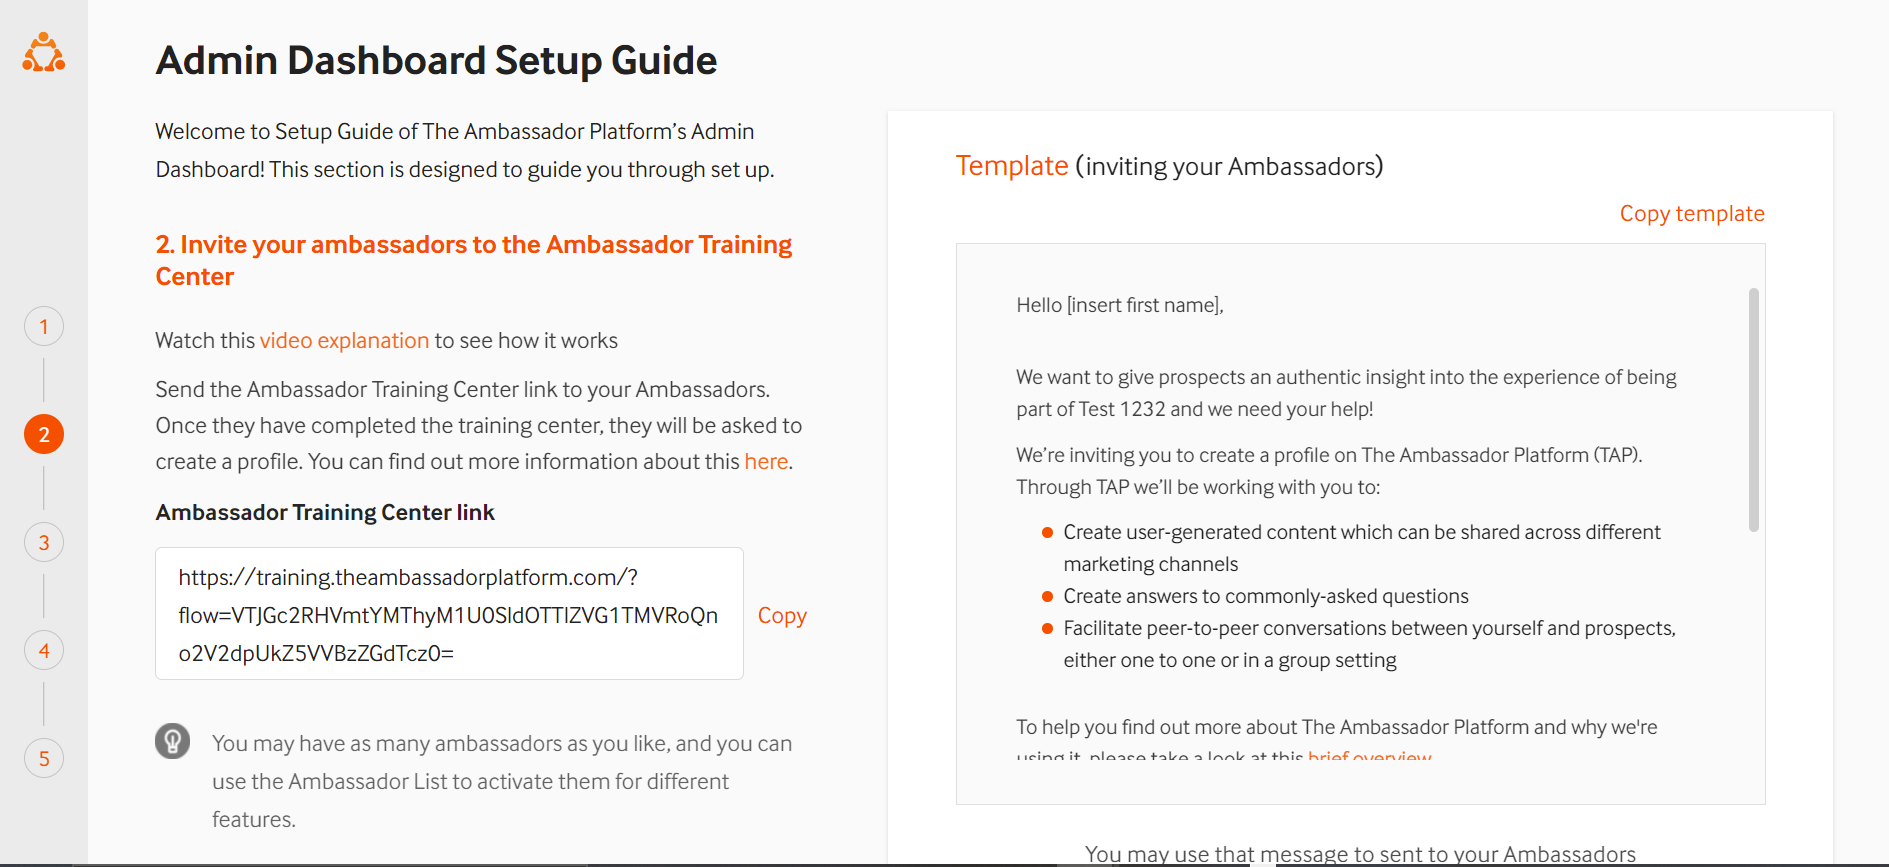
Your ambassadors will complete the training and then be invited to download our Ambassador Mobile App and create their profile.
Each time an ambassador profile is created, you'll be notified by email as an admin user and you can review their profile in the Ambassador List.
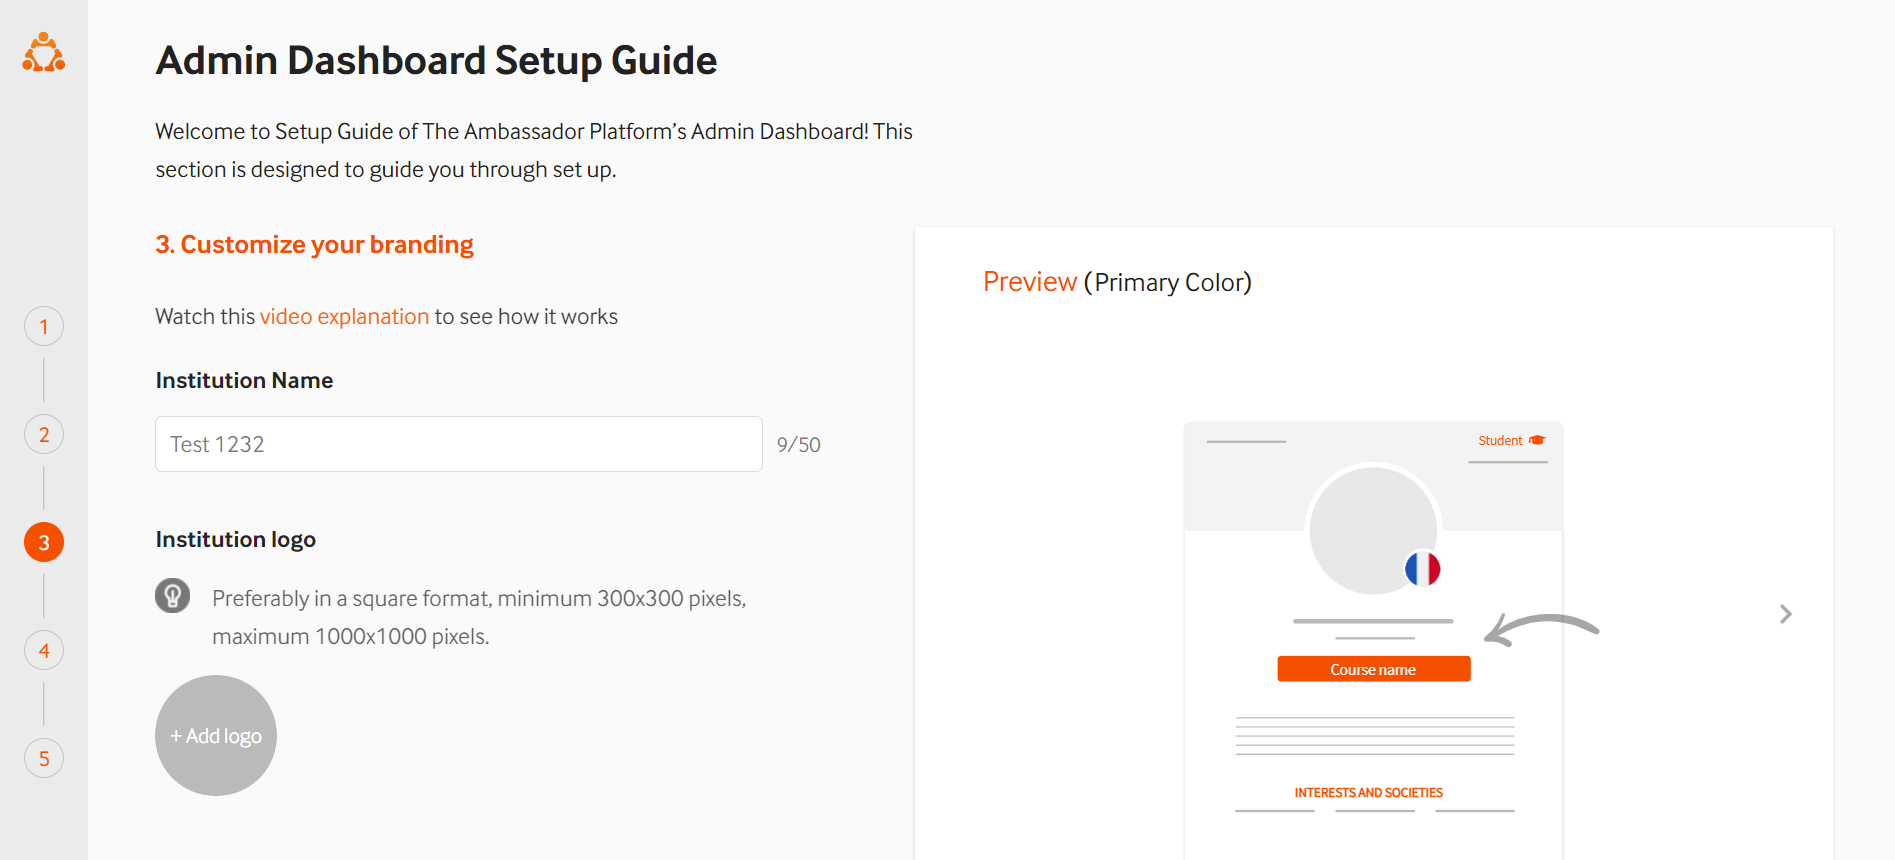
3. Customizations to fit your brand
You'll be invited to name your account, which is usually simply the name of your institution, upload your brand logo and brand colours in hex colour format.
4. Creating and embedding your Feed
The Feed is where prospects will be able to see your ambassador profiles and content. It is an iframe that needs to be embedded on a new page of your website. In step 4, you'll be able to customize the Feed to your preferences, such as changing titles, section headings and even customizing the drop-down filters.
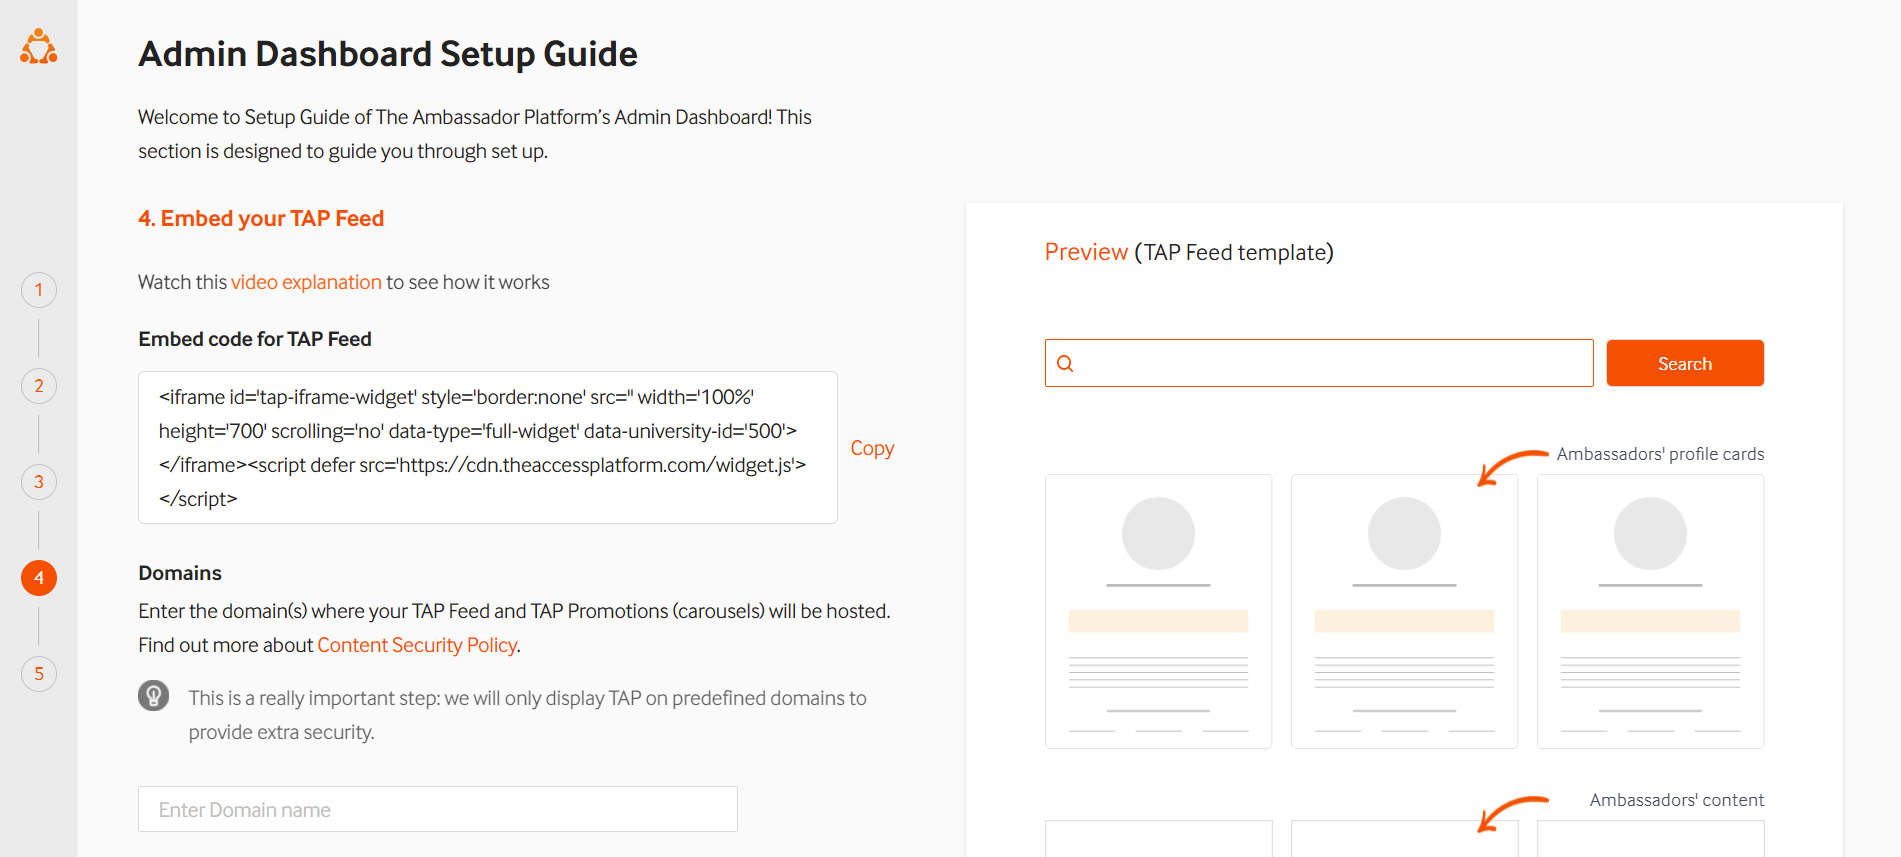
If you don't yet have any ambassador profiles active, or content posts or FAQ answers published, your Feed will be empty.
You can read more about how to set up your Feed here.
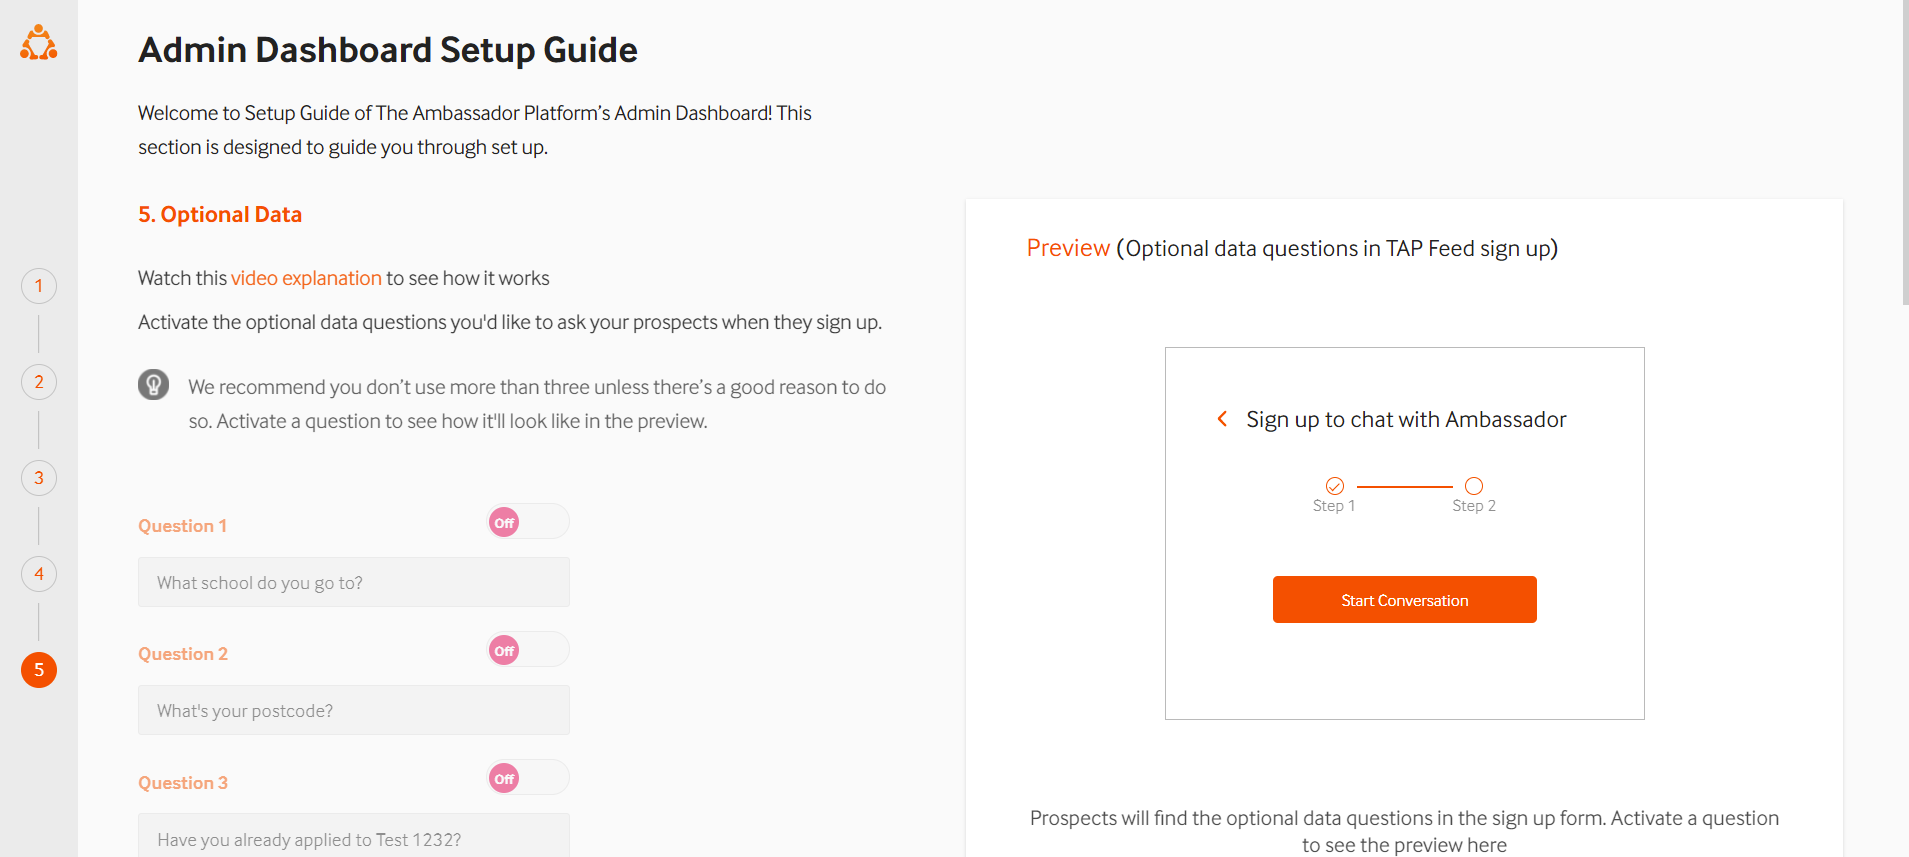
5. Optional Data collection
You may like to collect additional data from prospects, such as if they have already applied to your institution. Collecting this data is easy on TAP, you simply click to switch on the questions you want to activate. If you'd like to create your own questions, there are Custom Question options available too.
That's it, these are the 5 steps in account setup. There are other settings you might like to adjust too such as:
Check out the rest of the Knowledge Base to learn more about the service and get in touch if you have any questions!